Techniques
Alternate Picking

In this four lesson tutorial, I will explain what alternate picking means, demonstrate and talk about alternate picking technique, then show you two simple exercises to get you started.
Published: 06/27/2012 Upgrade

In these six lessons, I will talk about the importance of practicing using different styles of picking, and I will show you a few more really useful exercises that will help you get your alternate picking technique up to par.
Published: 06/28/2012 UpgradeBending - Country

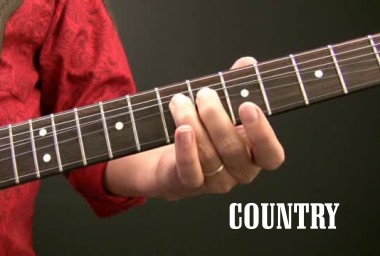
This tutorial on string bending was inspired by a few subscribers in the forum, that wanted to know how to start bending strings. I started with useful tips, followed by sixteen lessons using whole tone bends on the B string. In the first eight I'm bending the 2nd note of the scale up to the 3rd. In the next eight I'm bending the 4th note of the scale up to the 5th, and close with tips on how to use them.
Published: 12/07/2008 Upgrade
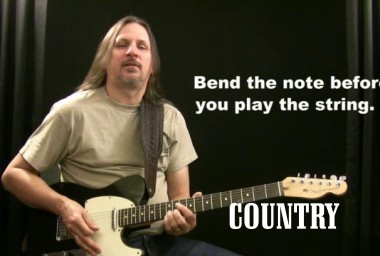
This tutorial on prebending strings was inspired by all the other string bending tutorials, and all the legendary guitarists that use this concept. In the first lesson I'll mention a few of them, then show a couple of examples using this trick. Then I use bending positions that work with the 1, 4, and 5 chords in the key of A, and also talk a little about how palm muting works with this too.
Published: 01/08/2010 Upgrade

This tutorial on prebending strings was inspired by all the other string bending tutorials, and all the legendary guitarists that use this concept. In these lessons I'm sliding up a whole step to the note, prebending the string up to the same note, and releasing the bend. Put these together for a 1, 4, 5, 1 progression in the key of A.
Published: 02/21/2010 Upgrade

This B-bender guitar tutorial was inspired by a subscriber in the forum, that had recently gotten one of theses guitars. In the first lesson I'll describe this device, tell you how it works, and use it to complete an A chord. Then I'll show you a two finger bending combination, and then the same one using a bar instead. Both of these concept's are useful, and can lead to some great licks.
Published: 08/26/2009 UpgradeBending - Rock


In these rock soloing technique lessons, we'll be teaching you some essential bends and vibrato technique that will aid you in your lead playing. You'll be learning four types of bends here: up and down bends, pre-bends, bend and choke, and bending one string but not the other. Next we'll show you some vibrato technique, then put all of it together.
Published: 03/19/2009 Upgrade

In this next tutorial on rock soloing, Anders Mouridsen will teach you bending and vibrato techniques. We'll start with an overview introducing the techniques and a suggested tone for them. Then you'll learn basic bending, your first bending lick, and do some jamming with it. We'll do the same using our vibrato technique, then combine both techniques. We'll end with some easy practice exercises.
Published: 12/27/2012 Upgrade

In this series of lessons, Anders Mouridsen will take your bending up a level. First we'll get a brief overview and talk about a bending tone, then we'll explore using double bends in your leads. Bending up on one string and down on another is next; we'll then learn about wide bends. We'll combine all three bending licks together and improvise, and conclude with practice exercises.
Published: 07/12/2013 Upgrade
In this tutorial, Anders Mouridsen will teach several techniques to apply to our soloing. Anders will introduce the concepts then dial in a tone for our lessons; then take a look at dynamic picking. We'll follow with an important element of expression: grace notes. After that we'll learn more on bending along with slides, then we'll add vibrato to the bends. We'll cap things off by applying these tools to our go-to and chord tone licks.
Published: 06/27/2013 UpgradeFinger Picking

In this tutorial I'll teach you the first level of acoustic fingerpicking. We'll get started with a basic four-step pattern, then learn how to change chords with it. We'll then do some 2 and 3 chord practice drills followed by two songs. Then it's time for drills to build your speed and play another song. Next we'll learn different styles, play another song, and finish with more drills - and a final song! Fingerpicking guitar isn't just a technique; it's an art form that has been passed down, evolved, and refined through generations of guitarists. This intricate style, where guitarists pluck the strings directly with the fingertips, nails, or picks attached to fingers, creates a uniquely resonant and complex sound that's as captivating as it is expressive. The roots of fingerpicking guitar can be traced back to early stringed instruments and musical traditions from around the world. However, it truly began to flourish in the American South, where it became integral to blues, folk, and country music. Picture this: musicians sitting on porches or around campfires, sharing stories and tunes, their fingers dancing over the guitar strings, weaving together melodies and rhythms that tell tales of life, love, and hardship. If you're eager to dive into this rich tradition, fingerpicking lessons are your gateway to unlocking the magic. Guitar fingerpicking lessons can vary widely, from the basics of plucking patterns to complex melodies that require a dexterous touch and years of practice. What's cool about learning fingerpicking is that it opens up a whole new world of musical possibilities. Unlike strumming, which often focuses on rhythm and harmony, fingerpicking allows you to play the melody, harmony, and rhythm simultaneously, making the guitar sound like an entire band in the hands of a skilled player.
Published: 09/22/2008 Upgrade
Now that you have mastered the 4-Step Pattern, let's take things to the next level by adding variations of that pattern to create full-measure classic patterns. Along the way, you'll learn to play several classic songs, including Thyme, Blow Ye Winds of the Morning, and Make Me a Pallet on Your Floor. Get ready to ramp things up!
Published: 10/04/2008 Upgrade

Now that you have mastered the 4-Step Pattern and full measure variations in 4/4 time, let's take a look at new patterns in 3/4 time and 6/8 time. Along the way, you'll learn to play several classic songs, including Star of the County Down, Do You Love an Apple, and a beautiful arrangement of Scarborough Fair with an impressive fancy figure you can play!
Published: 12/03/2008 Upgrade

In this segment, we'll bring all your hard work and solid skills to work in learning to play 3 full songs, complete with fancy ornamentations and arrangements to learn. You'll learn to play The Water is Wide, John Riley, and Lord Franklin's Lament. Prepare to add these beauties to your repertoire.
Published: 01/07/2009 Upgrade

This instrumental song project uses a single fingerpicking pattern, and some chord variations There are no other fancy moves, which makes this a great piece for the Advanced Beginner to Intermediate student. Mastering a Song Project is a great way to solidify your skills and build your repertoire.
Published: 06/01/2009 Upgrade


Jorma Kaukonen started here. Taj Mahal, and Keb' Mo' too, plus dozens of other acoustic blues masters. Even if you're new to fingerpicking, this tutorial will walk you step-by-step through learning to play the fingerstyle blues, and load you up with an impressive collection of tricks and riffs you can toss in at any time. You'll even learn to write your own blues song!
Published: 05/09/2012 Upgrade
In this set of lessons, Caren Armstrong will teach basic Travis picking technique. We'll start with an overview of Travis picking, then get into basic terminology and orientation. Next up is the important hand position, the we'll detail the basic picking pattern and counting the rhythm. A simple exercise follows; then we'll review some reminders of what not to do. Then we'll play some examples in 3 keys, and end with increasing your speed.
Published: 10/21/2013 UpgradeHammer-ons and Pull-offs


If you're looking to be more expressive and dynamic in your lead playing, then learning about hammer-ons and pull-offs is a great technique to get under your fingers. The basic concept is fairly simple: a hammer-on is hammering your finger onto the fret without picking it, creating a tone. The pull-off is the equal and opposite. We'll work on building finger strength, using the pentatonic and dorian scale, playing legato, using open strings, and how to "pull-hammer-slide".
Published: 02/19/2009 Upgrade

In this set of lessons, Anders Mouridsen will teach you hammer-ons and pull-offs. First we'll talk about what they are, then dial-in a good tone. Then we'll learn how to play both hammer-ons and pull-offs, and then combine the two techniques. Then it's time to learn a lick, and after that you'll learn to improvise with it. To conclude, we'll teach you some easy practice exercises.
Published: 12/27/2012 UpgradeHybrid Picking
This tutorial on basic hybrid picking exercises was inspired by a young man who asked me how to get started hybrid picking. I'll show you a variety of exercises that you can do to develop your hybrid picking. In the first five lessons I'll show you some basic exercises using the A, G, E, C, and D chords. Next I'll show you a couple using barre chords, and then how to alternate the bass notes using the A, D, C, and B chords.
Published: 12/13/2008 Upgrade

This tutorial of hybrid picking exercises was inspired by pickers I've met while performing, and they wanted to know how to get started hybrid picking. These five easy exercises are all root/5 picking patterns, with alternating bass notes. First I'll show you exercises using E, and then A barre chord formations. Then I'll show you similar exercises using the other basic chords.
Published: 11/20/2011 Upgrade

Hybrid picking is a hybrid of using a pick and using the fingers to get a snappy, chicken picking sound. This series of lessons will get you started with solid techniques that will get your hybrid picking fundamentals down.
Published: 08/19/2009 Upgrade
This tutorial on basic hybrid picking exercises was inspired by a young man who asked me how to get started hybrid picking. I'll show you a variety of exercises that you can do to develop your hybrid picking. In the first five lessons I'll show you some basic exercises using the A, G, E, C, and D chords. Next I'll show you a couple using barre chords, and then how to alternate the bass notes using the A, D, C, and B chords.
Published: 12/13/2008 Upgrade

This hybrid picking progression in A was inspired by the basic hybrid picking exercises, to show how adding other concepts to the exercises can make some awesome riffs. First I'll show you the riffs using the 1, 4, and 5 chords in the key of A. I'll also talk about palm muting, and then play them in a progression.
Published: 09/27/2011 Upgrade
This tutorial of hybrid picking exercises was inspired by pickers I've met while performing, and they wanted to know how to get started hybrid picking. These five easy exercises are all root/5 picking patterns, with alternating bass notes. First I'll show you exercises using E, and then A barre chord formations. Then I'll show you similar exercises using the other basic chords.
Published: 11/20/2011 UpgradeLeft Hand
In this set of lessons, Caren Armstrong will teach you how to develop good left hand technique. We'll start with an overview of the lessons, then look at the elements of basic left hand technique. Following that we'll look at chord position and placement; then learn about strength versus finesse in making our chord shifts. Chord connections are up next, and we'll conclude by wrapping up all the concepts.
Published: 04/10/2013 Upgrade
What does the left hand do? This tutorial of 3 lessons shows absolute beginner guitarist students the basics of left hand technique. Topics include fretting the strings with fingertips, fingerpads, barring with the whole finger, muting, hammer-ons, pull-offs and trills.
Published: 06/07/2007 UpgradeLegato

This tutorial covers the basics of musical articulations: legato and staccato. We'll have an introductory look at these musical terms; what they are, what they mean, how they sound and how to play them.
Published: 05/23/2022 UpgradePalm Muting
Palm muting is an essential technique for every rock guitarist, and is simple to learn! This tutorial will walk you through the mechanics of how to use palm muting with power and barre chords, accents, and more.
Published: 10/05/2009 Upgrade

This series of lessons will teach the user how to combine barre, power and open chords along with palm muting and arpeggiation to create chord progressions that rock.
Published: 10/05/2009 Upgrade

In this set of lessons, Anders Mouridsen will take your palm muting to the next level. Anders will introduce the concepts of right hand control, then dial in a suitable tone. After that we'll look at where and when to mute, followed by how to apply and release your palm. Palm muting arpeggios is up next, then we'll learn how to palm mute bass notes. We'll put it all into a practice tune, and finish up with some easy practice exercises.
Published: 06/05/2013 UpgradeSlapping


Slapping is a technique that is most often thought of in the context of bass playing- but you can do it on guitar too! In this set of four guitar lessons you'll be introduced to slapping techniques on guitar; how to use your thumb to get the slap in the lower notes, and fingers to get that pop in the upper notes. We'll use a backing track to help you get in the groove.
Published: 05/20/2007 UpgradeSlide - Bottleneck

In this tutorial we'll answer questions about the tonal differences between using your fingers instead of a pick. We'll also look at the bottleneck slide, then how to use a capo. All these are important components of getting great blues tone and style.
Published: 06/15/2010 Upgrade

Using a bottleneck slide is an expressive technique often used in blues. In this tutorial, we'll look at basic slide technique, open D tuning and standard tuning, some Duane Allman approaches, how to play slow blues slide, and pedal steel 3rds. We'll conclude by jamming along with a backing track.
Published: 08/10/2009 Upgrade
In this tutorial we'll answer questions about the tonal differences between using your fingers instead of a pick. We'll also look at the bottleneck slide, then how to use a capo. All these are important components of getting great blues tone and style.
Published: 06/15/2010 UpgradeStrumming - Boom-Chick
This tutorial on the Boom-Chick Strumming pattern was inspired by our site to show you how useful it is. In the first four lessons I show you the pattern using the 1, 4, and 5 chord in the key of A, followed by a progression in the next lesson. I change to a 16th note pattern with a D chord in the fifth lesson, and then finish up with a D progression using the 16th note strumming pattern.
Published: 08/05/2008 Upgrade

I will start by introducing you to boom chick fingerpicking, and in the four lessons that follow, I will teach you a little song I wrote just for this tutorial. We will start with the thumb, then add some chord hits, and ultimately we will learn the melody and put it all together. Let's dive in!
Published: 04/30/2010 Upgrade

In this series of lessons I will teach you a nice way to play unaccompanied blues on just the acoustic guitar. I will show you what to play over the I chord, the IV chord and the V chord, and I'll show you a cool turnaround that you can add to your personal library of turnaround licks. Let's go!
Published: 01/05/2012 Upgrade
In this second tutorial in my Boom Chick Blues series, we will build upon what we learned in the previous tutorial and take it to the next level. We will add a few licks to the mix, and play around with the chords a bit more. Watch out for the blazing fast ending lick! The very last lesson contains a slowed down performance to make it easier to follow.
Published: 01/09/2012 UpgradeSweep Picking
In this tutorial, Eric Barnett gives you the essentials of sweep picking, to get you started on this rock and metal guitar technique. We'll go through what sweep picking is, the right and left hand functions, and detailed exercises on both and how to put them together.
Published: 11/09/2010 Upgrade

In this tutorial, Eric Barnett takes you up into advanced levels of sweep picking. Picking up where he left off in "Introduction to Sweep Picking", Eric will show you how to embellish 5 string shapes in a couple of different ways, how to sweep tap, and moveable shapes.
Published: 11/09/2010 Upgrade

This tutorial covers the basics of sweep picking technique. We'll apply the technique to an exercise involving 3 note triads in major and minor key chord progressions. We'll also get a lot of practice playing these examples along with backing tracks.
Published: 01/10/2022 Upgrade

This tutorial expands on the basics of sweep picking technique. We'll apply the technique to an exercise involving chord tones on 4 adjacent strings in major and minor key chord progressions. We'll also get a lot of practice playing these examples along with backing tracks.
Published: 01/24/2022 Upgrade

In this tutorial you will learn to apply sweep picking technique to some basic chord progressions in a pop rock, R&B and country style setting using major and minor chord tones and scale notes.
Published: 02/08/2022 Upgrade

In this tutorial you will learn to apply sweep picking technique to some basic chord progressions in a blues and jazz style setting using major and minor chord tones and scale notes.
Published: 02/21/2022 Upgrade
This tutorial covers advanced applications of sweep picking technique. We'll apply the technique to an exercise involving multiple voicings of major, minor, augmented and diminished chords and chord progressions. We'll also get a lot of practice playing these examples along with backing tracks.
Published: 07/11/2022 Upgrade
This tutorial covers more advanced applications of sweep picking technique. We'll apply the technique to an exercise involving 4, 5 and 6 string voicings of major, minor, augmented and diminished chords and chord progressions. We'll also get a lot of practice playing these examples along with backing tracks.
Published: 07/20/2022 UpgradeTapping

This tutorial will be very beginner friendly. Over the course of seven lessons I will teach you the basic tapping technique, and we'll practice it over a few backing tracks. Let's go!
Published: 05/18/2012 Upgrade
In this tutorial consisting of 9 lessons, I will get you started with learning your fretboard horizontally, so you know what notes to pick for your tapping licks. We'll start with scales and then move to arpeggios. As usual, there are 4 examples with backing tracks so you can put theory into practice.
Published: 05/25/2012 Upgrade

In this tutorial, I will teach you how to tap harmonics, and we will work on three fairly advanced tapping examples over backing tracks. At the end of the tutorial, I included slower versions of the backing tracks that gradually increase in tempo, so you can take your time and build speed.
Published: 07/04/2012 Upgrade

In this tutorial, we will leave triad arpeggios behind for a bit, and focus on licks where the notes are closer together, as well as tap sliding.
Published: 01/31/2013 Upgrade
In this first of a two part series you'll learn single finger tapping ideas with arpeggios, sliding, string bending, pentatonic scales, diatonic scales, pedal points, and tapping harmonics.
Published: 03/04/2019 Upgrade

In this second of a two part series you'll learn playing independent ideas with left and right hands, fast legato shred lines, percussive tapping, jazzy bass lines with independent chords tapped on top and acoustic banging and tapping harmonics.
Published: 04/05/2019 UpgradeTouch Technique


Are you curious about touch and tapping on guitar? This unusual technique can produce some beautiful, distinct sounding chords and melodies. In this tutorial, HP Kruesi will delve into this fascinating approach in the style of Stanley Jordan using both your left and right hands on the neck. HP will get you started by showing you the basics, put the technique into use in the context of jazz and blues styles, and some exercises.
Published: 04/16/2006 Upgrade

Here I'll be teaching you some more essentials on touch technique in the style of Stanley Jordan. I'll be talking briefly about touch tapping, then we'll work from the beginning up to some more advanced techniques and ideas in four parts. At the end we'll put it all together into a classical style song.
Published: 03/12/2012 UpgradeTrillsVibrato
No Tutorials Found
Whammy Bar
In this tutorial, we'll learn some rock whammy (or "vibrato") bar techniques. I'll start by looking at some basic techniques and licks, then talk about how the whammy bar works and some insights into tuning issues. Then I'll teach you a rock riff with whammy, some "divebombing", and some ornamental dips. Next up are a few lessons using hammer-ons and pull-offs, followed by "harmonic dipping and screaming". We'll end with a play along.
Published: 05/04/2011 Upgrade

In this tutorial we will learn 3 whammy bar tricks to spice up your blues playing technique.
Published: 05/26/2011 Upgrade