This guest post is presented by our friends at LANDR, a platform that offers a place to create, master and sell your own music.
There’s nothing more satisfying than writing your first song. All that time spent learning chords, writing lyrics, structuring your song and composing melodies has paid off.
Now it’s time to record your track, mix, master and release it into the world for your friends, family and hopefully some new fans.
But getting your track from a bedroom demo to a finished song that everyone can listen to on Spotify and beyond requires some learning if you’re starting fresh.
This is the part of the songwriting process where a handful of production techniques come into play.
Don’t be afraid—tasks like recording, mixing and mastering may seem overwhelming, technical and even expensive.
But with a few tips, some basic tools and a little bit of learning, getting your first song finished and released is easier than you think.
Let’s dive in.
Recording your song
Making a great recording seems intimidating, but the truth is that you can get good results by being creative and keeping it simple.
In fact, plenty of big tracks have been made by DIY producers working in their bedrooms.
Here’s the short list of things you’ll need to make your first recording:
- At least one microphone (preferably two)
- A digital interface with an input for each microphone
- A computer that can run DAW software like Garageband
If you’re a singer-songwriter who just wants to record vocals and acoustic guitar you can get pretty decent recordings with some in-expensive gear and record in your bedroom.
To record a guitar and vocal part you need at least two mics—one for vocals and one for guitar.
But adding an extra room mic (literally a condenser microphone set up to record the room) won’t hurt.
The more complex your setup becomes the more microphones, audio interface inputs you’ll need to have.
Of course, if you don’t have enough microphones and inputs you can always just overdub over your main recordings.
Overdubbing is when you record parts overtop of a main bed of tracks.
For example, you might track guitar and vocals as your bed and then overdub guitar and drums to fill out your arrangement.
Side note, if you’re recording drums, you’ll need at least three mics—kick, snare and an overhead.
Get your mic count in order, because each mic you’ll be using requires an input to track into your sound card.
If you're lost about which mics to choose, head over to this guide. Or if you just want to get started with the simplest possible setup, here are the best recommendations for beginners.
Once you have all the gear you need to route the audio through your sound interface into your DAW and then check how it sounds and make any adjustments to avoid clipping.
Aside from technical stuff like audio routing, gain staging and DAW setup—making adjustments to your mics and finding the right room sound is part of the art form that is recording.
So experiment and don’t be afraid to make mistakes—it’s truly the only way you’ll learn how to self-produce your music.
Mixing your tracks
Alright, you successfully got a recorded take of your song that you’re happy with. Congrats! That’s seriously half the battle, so pat yourself on the back.
Welcome to the mixing phase. We’re nearly ready to celebrate your brand new release.
When you mix your track you will use a handful of techniques to shape, cut and fit together each part to make each raw recording sound uniform and more pleasing to the ears.
You’ll use EQ, filters, compression, gain, automation, reverb, delay and other audio effects make these changes to your overall mix.
It’s easy to overcomplicate mixing and get overwhelmed—the best advice is to trust your ears.
Don’t be afraid to close your eyes and pinpoint parts of your mix that you want to change—how could you level things differently, what parts do you want to hear more or less of.
Getting a pair of inexpensive mixing headphones won’t hurt either.
There’s lots of great mixing advice out there, but here’s some basics to watch out for as you approach your first mix.
Pay attention to the balance in frequencies across the spectrum.
When you record audio, movements, bumps, and even the air hitting the microphone create unneeded high-end and low-end frequencies that you don’t need in your guitar and vocal parts.
It’s a common mistake to leave these frequencies in the mix, so use EQ and filters to carve out space for each instrument to occupy a specific section of frequencies.
Let the bass and kicks use the lower parts of the frequency spectrum and leave the mid and top end for the vocals and guitar.
Compression is great to tighten up and control instruments that typically use a wider dynamic range—like vocals and percussion.
Effects like reverb, delay and modulation can add space and shape to a vocal or guitar part.
There’s a lot to learn about mixing, but you might even find that it’s a part of the process that you enjoy. If you want to learn more, we published the full guide to mixing your tracks like a pro over at the LANDR Blog.
Mastering your tracks
Compared to mixing, mastering is much more of a technical process.
When you master your tracks, a mastering engineer will apply subtle amounts of compression, EQ and gain to ensure the song sounds as good as it can on any speaker.
Mastering is a highly technical process that produces very subtle, but important changes in your tracks that you need for your music to be release-ready.
The speakers in your phone, Bluetooth boom box, car stereo and beyond all sound very different from your mixing headphones.
So you need to master the music to make sure your tracks are guaranteed to sound good on any medium you play them through.
But mastering is a technical process that takes years to learn.
Fortunately, today’s there’s automated mastering platforms that use AI to apply the same processes that human engineers use at a fraction of the price.
LANDR Mastering is the pioneer of automated mastering, it has the best algorithm out there for getting your tracks sounding as good as most human made masters.
If you’re looking to master your tracks on a budget, definitely give LANDR mastering a try.
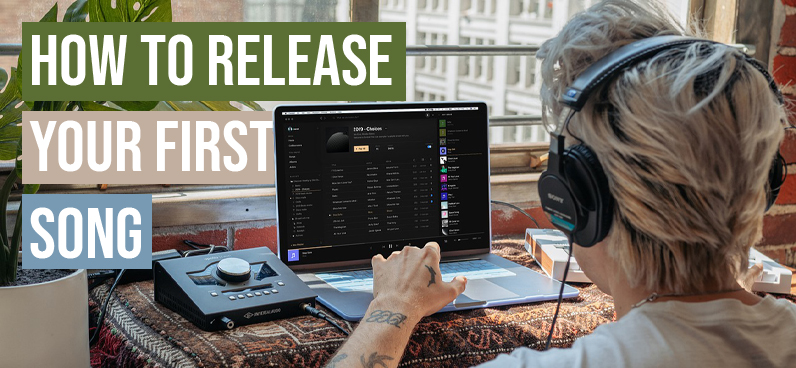
Releasing your tracks
Wow! You made it!
With your final master in hand, it’s time to release your track.
These days you don’t need a record label to get your music heard internationally.
Digital distribution makes it possible to get your music into streaming stores like Spotify and Apple Music where millions of people find and listen to new music every day.
Aside from setting up a release of your album on Bandcamp and Soundcloud, using the digital distribution route is probably the best way to get paid and find exposure.
There are many digital distribution providers out there (LANDR is one of them), so shop around and find one that fits your needs and budget.
Three, two, one, liftoff!
Ready to put yourself out there and have the world hear your music? You just need to turn that bedroom jam into a finished recording.
Now that you know the journey to get there, it’s time to buckle down and start tracking everything you need to finish your first recording.
Have fun, experiment, make mistakes. It’ll all feel worth it when you're celebrating the launch of your single, EP or album.
Good luck out there!